SOLO GitHub Guide
Technical Support Disclaimer
The SOLO FSW and SOLO FSW Projects organizations are maintained by the Lab and Research Support teams of SOLO department at Leiden University’s Social and Behavioural Sciences faculty. Please visit our wiki for information about the teams and about our support policy.
Note: SOLO will only provide support for projects kept under source control, when applicable. As such, when projects are delivered via GitHub, collaborators are required to keep their changes under source control if continued support is desired.
Unless otherwise specified, SOLO releases software under the GNU GPL v3.0 license, media under CC BY-NC-SA 4.0, and hardware under the CERN Open Hardware License Version 2 - Strongly Reciprocal license.
Index
- Technical support disclaimer
- Index
- Using GitHub and GitHub Desktop
- Python
- Contributing to SOLO FSW and SOLO FSW Projects
Using GitHub and GitHub Desktop
Basic explanations of git and its core concepts can be found here (or here or here).
For most users, we strongly recommend using GitHub Desktop, a very user-friendly graphical interface for git.
Cloning a Repository
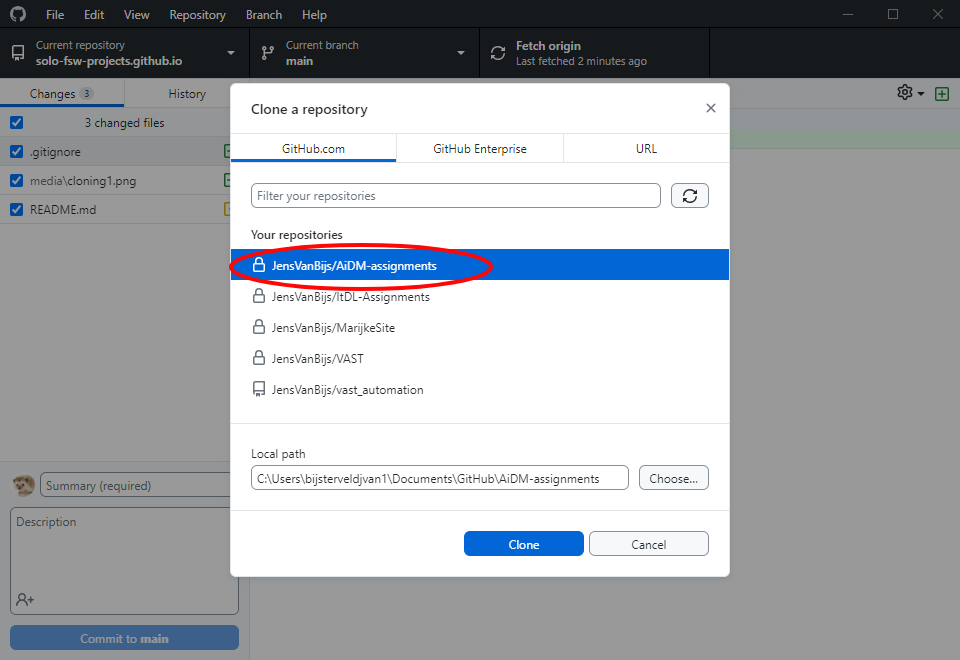
In order to use a repository under version control, one must first clone it, which, in essence, creates a copy of the repository on your local machine (called the local repository), which can then be used to track modifications on the online repository (called the remote repository).
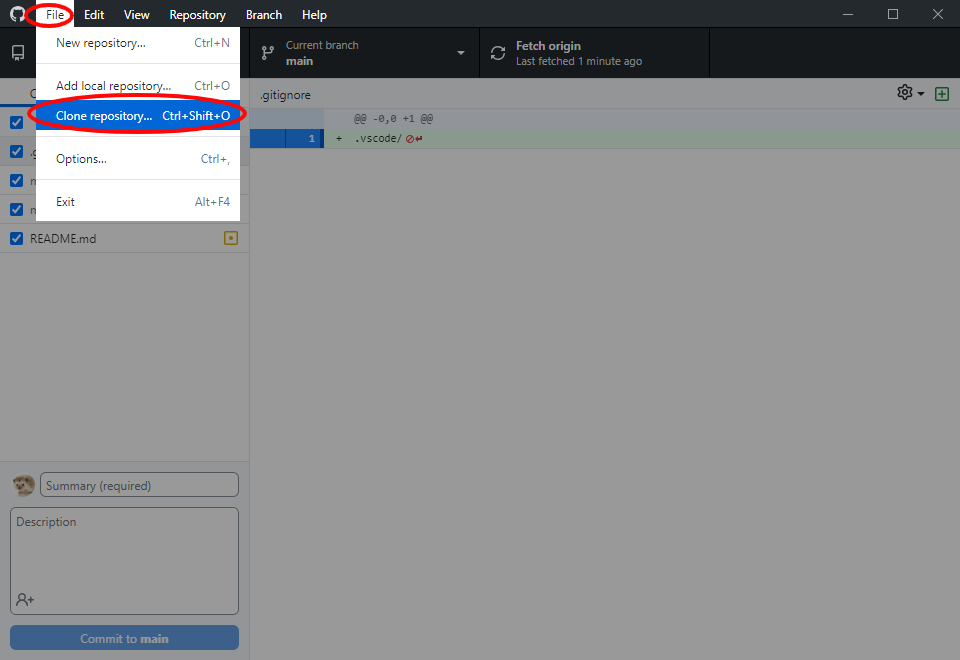
To clone a repository using GitHub Desktop go to file > Clone repository and then select the correct repository. Pressing the clone button will then clone that repository.
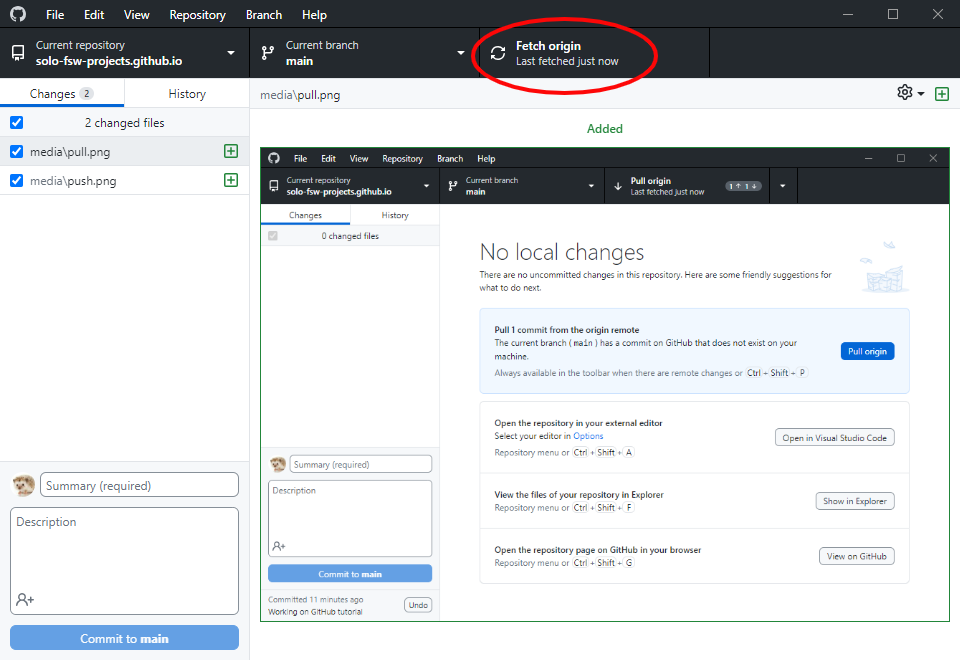
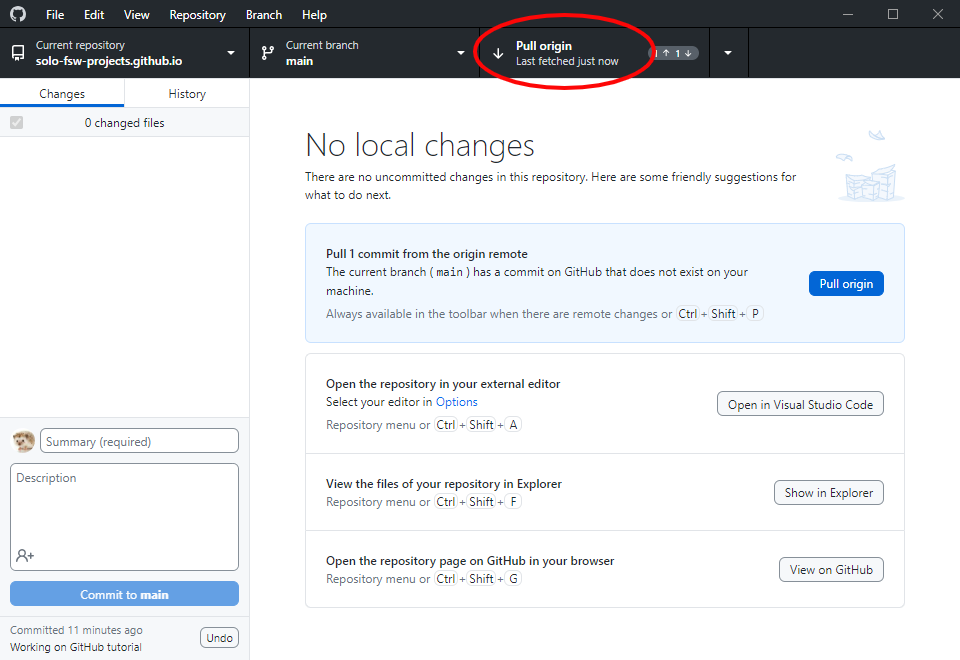
Once you have cloned a git repository, it is very easy to keep it up to date with its online counterpart. To do this using GitHub Desktop, press the Fetch origin button, which will change into a Pull origin button if changes were detected. Pressing this button will update your local repository.
Editing a Cloned Repository
Note: We advise making a new branch before adding, committing and pushing any changes you make. This will be explained in the next section: Using Branches
If you wish to make changes to a cloned repository, you can simply change your local copy. Git will track and list your changes, which GitHub Desktop lists on the left side of the screen.
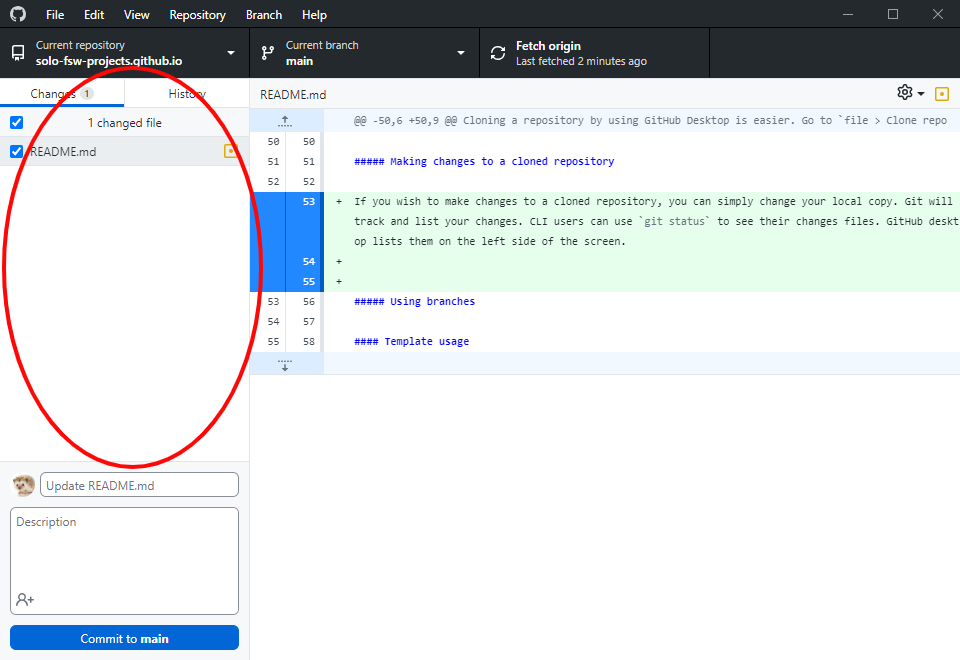
In order to make your changes permanent (add them to the git source control history) we need to select (aka stage) the modified files, commit those changes, and push them to the remote repo. In GitHub desktop, enabling files to be committed (aka staged) is done using the checkboxes in the “status panel”, which are all enabled by default. The summary field should then be used to write a commit message, and the Commit to <BRANCHNAME> button can then be used to commit the changes to the local repo. Once the local repo features commits not on the remote, the push origin button will appear, which can be used to push the local changes to the remote repo on GitHub. This will allow other collaborators to pull those changes to their local copies.
Using branches
When making changes to a repository, we advise you to create a branch. Branches provide a way of keeping different changes separated, and provide an easy way to revert changes in case of unexpected consequences.
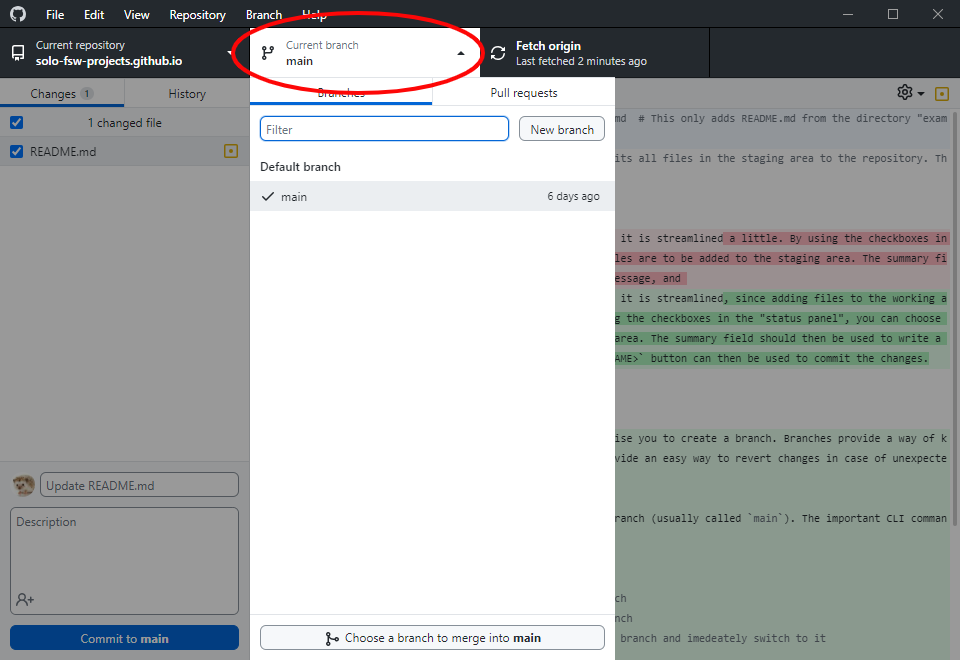
By default, your repository will have one branch (usually called main). However, software delivered by SOLO may be in different branches (e.g. development) depending on the stage of the project. In GitHub Desktop, the branching operations can be found by extending the Current branch menu.
We advise creating a new branch for each feature you wish to implement. However, this is more a preference / standard and is far from a strict requirement.
Python
Many of SOLO’s software projects are written in Python and make use of the conda environment management system.
With regards to opening and/or editing the Python source files, for most users, we advise using Visual Studio Code (aka vscode) due to its ease of use, extensibility and good compatibility with conda and the iPython kernel.
To generate the correct environment in which to run the Python code, you must first install Anaconda. Then, use the environment definition file (a .yml file) provided in the repo to generate the environment.
Basics
Installing Anaconda
To install the Anaconda distribution, please follow the tutorial they provide here. We recommend using the default settings that the installer provides.
Installing Visual Studio Code
To open and edit Python source files (or files written in other programming languages), we advise you to use Visual Studio Code, as mentioned above. It is a lightweight, user friendly and highly extendible and compatible code editor. To download, click here. Ensure you download the User Installer, as this version does not require admin privileges.
After downloading, open the installer and follow the instructions. After installing, Visual Studio Code should now be installed under C:\Users\%USERNAME%\AppData\Local\Programs\Microsoft VS Code, and can be opened through the different windows menus.
Opening and editing files
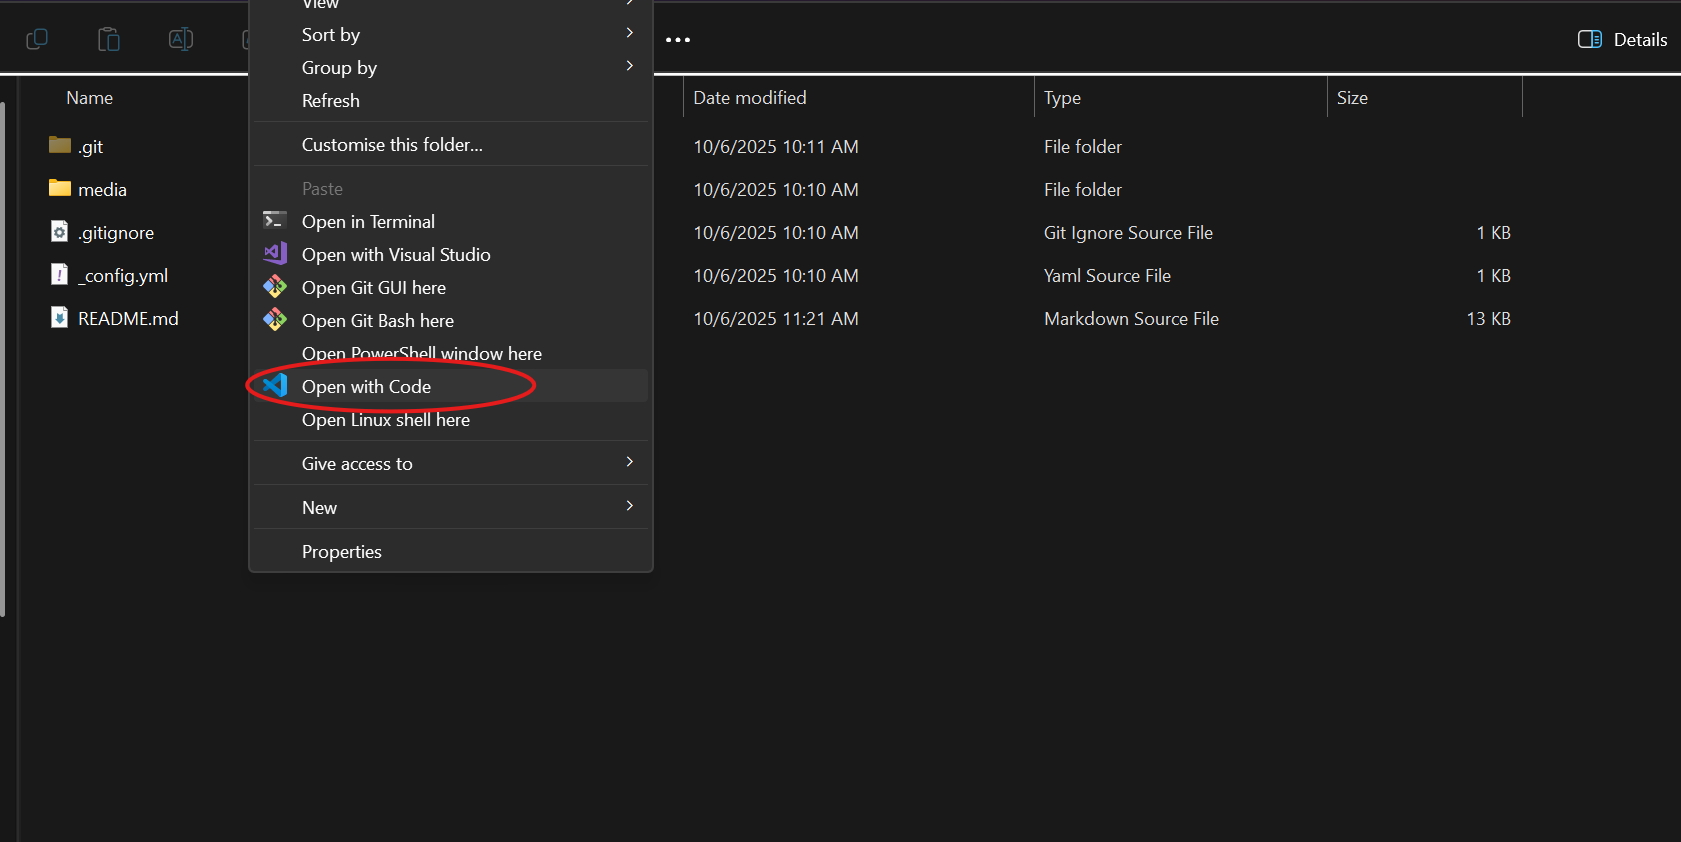
With Visual Studio Code installed, you can now open and edit different files. You can either create new files and folders or open them directly from Visual Studio Code or you can create or open them in the windows file explorer and then right click (windows 10) or shift + right click in the folder and select ‘open with code’. (Note: This might not work on all installations, so if it does not simply open Visual Studio Code, click file and select open folder, or select open folder on the welcome screen.)
You should now see the visual studio code window, with the folder you opened on the left hand side in the explorer. Feel free to explore the different menus a bit. To return to the explorer, either click the icon in the activity bar (the bar on the left of the window, the top icon is the explorer) or press Ctrl + Shift + E. Double click any file in the explorer to start editing it. It will also appear at the top of the window as a tab, so you can easily open multiple files and switch between them. It should look something like the following image.
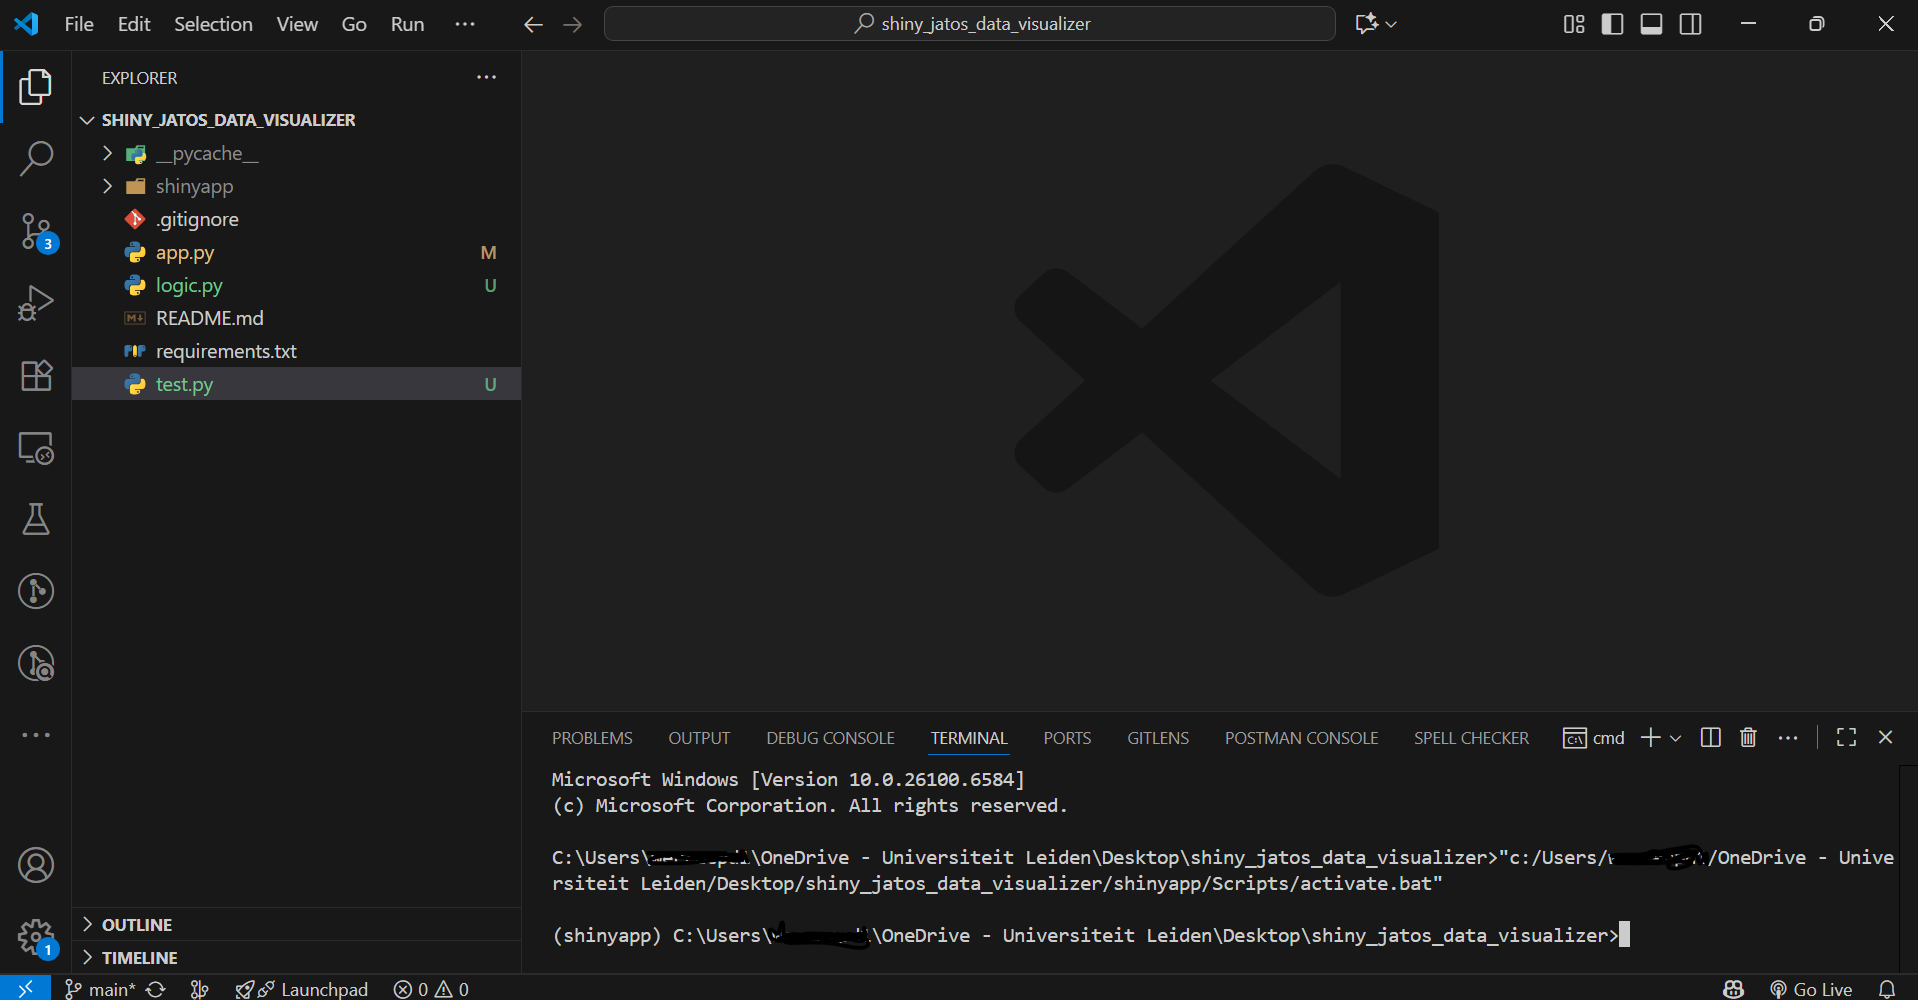
At the bottom of the window you can see the terminal window. This will be important later, as this will be where we create and manage our anaconda environment. For now however, there are some standard settings that should be changed. To do so, click File in the top left of the window and head to preferences and select settings. Use the search bar to search Integrated Default Profile Windows and change the setting from PowerShell to Command Prompt. After this, exit the settings.
Adding extensions
Visual Studio code is very powerful due to its extendability. In the activity bay (left), head to the extensions menu (also available through Ctrl + Shift + X). Use the search bar to search for Python and install the python extension provided by microsoft. Installing the Jupyter extension is also recommended.
Selecting a interpreter
Next, open a python file (ends in .py). at the bottom right of the window you should see a bar with different symbols and text. Most of this is not of interest to us, except for one thing: the selected python interpreter (usually represented by some numbers such as 3.13.1). Click on these numbers.

This will open a menu with different virtual environments and python versions. Since anaconda is installed, you should see an option named Python 3.X.X ('base') where the X’s are different numbers (depending on your python version). This is the option you should select. Remember the terminal at the bottom of the window? Close it by pressing the trash icon and re-open it by pressing Ctrl + `. You should now see (base) at the start of your terminal line, meaning that the base anaconda environment was enabled successfully. Now, we are ready to open our desired project folder (if you haven’t already) and start creating the anaconda environment.
Creating the Anaconda environment
Once in the desired folder, the interpreter should say ('base': conda) once a python file has been selected. If it does not, please select it from the interpreter menu. Now, open a new terminal (Ctrl + ` ) and wait for the base conda environment to initialize. Once this is done, check that the environment.yml file is in the opened folder. If it is, use the following command to set up the environment:
conda env create -f PATH/TO/FILE/environment.yml
Wait for it to finish creating the environment and installing the packages. After that, use conda activate ENVIRONMENT_NAME to activate the environment. Congratulations! You have successfully set up the working environment for your project!
Pip and Conda Terminal Commands
Both pip and Conda are package managers for Python. Packages allow users to extend their standard python library with different modules. These modules contain code written by other python developers, which can then be used in your projects. Examples include packages such as numpy and pandas, which are often seen for complex calculations and data management and visualization. For our purposes, it is advised to use anaconda, as this makes managing versions of packages and virtual environments easier. In this section some useful commands explained for using conda and pip. Remember to double check you have selected the right conda environment before you install packages.
Creating and activating conda environments
In order to create an empty anaconda environment, simply use the following command (replacing ENVIRONMENT_NAME with the desired environment name):
conda create --name ENVIRONMENT_NAME
Packages often recommend a specific python version. If you want to change the python version used for the creation of the virtual environment, the following command can be used:
conda create --name ENVIRONMENT_NAME python=VERSION
If a project with a existing environemnt.yml file has been delivered, you can create the anaconda virtual environment using this file. To do so, use the following command:
conda env create -f PATH/TO/FILE/environment.yml
The active anaconda environment can be converted into a .yml file using the command:
conda env export > FILENAME.yml
environment.yml files can be used to create new anaconda environments and are therefore the recommended way to clone virtual environments.
The above commands will create a virtual environment. That environment can then be activated by using the command:
conda activate ENVIRONMENT_NAME
Installing packages
After activating the environment, packages can be installed into it by using either pip or conda:
conda install PACKAGE_NAME
pip install PACKAGE_NAME
The conda command is advised over pip install PACKAGE_NAME, since this allows anaconda to track package versions. If you need to use pip for a certain install, ensure this is the last package you install, since the conda will sometimes fail to install new packages after pip was used.
When installing packages, the -c flag can be used to specify the origin of the package. An example is given below:
conda install -c CHANNEL_NAME PACKAGE_NAME
Often used channels are conda-forge and cogsci.
Sometimes packages can be installed straight from GitHub. This requires the usage of pip with the command:
pip install git+GITHUB_REPO_LINK
You can see what packages (and package versions) are installed in a specific environment by using the command:
conda list
Adding a package name after the conda list command will trigger a search for that specific package, only listing that package and/or packages with similar names.
Contributing to SOLO FSW and SOLO FSW Projects
Naming Conventions
Repositories in both organizations should follow the naming convention <Project name/description>-<Date/Year if applicable>. The solo-fsw-projects repos are further prepended with <Lab/section/institute>-<PI/lead-researcher if applicable>-. The names should contain only lower-case letters, numbers and dashes.
The official shorthands for all the research units for which SOLO provides support is presented below.
| Abbreviation | Dutch unit name | English unit name |
|---|---|---|
| IPW | Instituut Pedagogische Wetenschappen | Institute of Education and Child Studies |
| FGJ | Forensische gezinspedagogiek en jeugdhulpverlening | Forensic Family and Youth Care Studies |
| L&GO | Leer- en gedragsproblemen in het onderwijs | Learning and Behaviour Problems in Education |
| NPOS | Neuropedagogiek en ontwikkelingsstoornissen | Clinical Neurodevelopmental Sciences |
| ONWS | Onderwijswetenschappen | Educational Sciences |
| O&O (IPW) | Opvoeding en ontwikkeling | Parenting, Child Care and Development |
| OMS | Onderzoeksmethoden en statistiek | Research Methods and Statistics |
| PSY | Psychologie | Psychology |
| COG | Cognitieve Psychologie | Cognitive Psychology |
| GMN | Gezondheids-, Medische en Neuropsychologie | Health, Medical and Neuropsychology |
| KP | Klinische Psychologie | Clinical Psychology |
| MS | Methodologie en Statistiek | Methodology and Statistics |
| O&O (PSY) | Ontwikkelings- en Onderwijspsychologie | Developmental and Educational Psychology |
| SE&O | Sociale, Economische en Organisatiepsychologie | Social, Economic and Organizational Psychology |
Templates
In order to standardize the structure of SOLO repositories, we created a few template repositories.
The most basic repository template is called solo-base_repo_template. This template contains the bare minimum structure we expect to find in a repository, which is:
- A README file for writing documentation / additional explanation about the project
- A LICENSE file containing the GNU GPL v3.0 license
- A .gitignore file for specifying files that are to be ignored by git (like, for example, data files)
- A readme-media directory for including media in the README file
- A metadata.yml file containing a YAML format for providing metadata about the project
The base template was extended into two other templates, each with a specific purpose in mind. The solo-python_package_repo_template contains additional structure for creating (and distributing) a python project for pip using GitHub. The solo-software_hardware_repo_template contains additional structure aimed at projects involving both software and hardware.